




Using existing drawings for a refurbishment
Contents |
[edit] Introduction
Most refurbishment projects start with a set of drawings that someone already has. They may be the original architect's plans, a building control submission from the 1980s, a surveyor's sketch from a previous sale, or a scan of a sheet found in a cupboard. They are cheaper and quicker than a new survey, and they are often the only record of what is hidden behind finishes. They are also often wrong.
This article covers where existing drawings come from, the usual ways they differ from the building, and how to check them before design work relies on them.
[edit] Where existing drawings come from
Common sources include:
- the building owner or previous owners, who may have the original planning or building regulations drawings;
- the local planning authority, whose online records usually go back to the late 1990s or early 2000s, with older files held on paper or microfiche;
- building control records, which may include structural calculations as well as plans;
- the original architect or engineer, if the practice still exists;
- local archives and record offices, for older and listed buildings;
- estate agents' floor plans, which are useful for layout but rarely drawn to scale.
Each source tells you what was intended or approved at one point in time. None of them tells you what was actually built, or what has changed since.
[edit] How drawings and buildings drift apart
Differences between a drawing and the building usually come from a handful of causes.
Changes during construction. Walls move, openings are resized and stairs are turned on site, and the drawings are not always updated. "As built" drawings are less common than the title block suggests.
Later alterations. Extensions, knocked-through rooms, new partitions and blocked-up windows are often done without drawings, or with drawings that were never added to the file.
Copying errors. A plan that has been photocopied, faxed or scanned several times may be stretched slightly in one direction. A scan of a print at an unknown scale may not be at the scale written on it.
Drawing conventions. Older drawings may use imperial units, show wall thicknesses that include finishes or exclude them, or leave out non-structural partitions entirely. Design sketches may show sizes written in the rooms rather than dimension lines.
[edit] Checking the drawings
Before relying on existing drawings, it is worth a short site visit with a tape or laser measure. A practical sequence:
- Check two or three long overall dimensions, at least one in each direction. If they match, the scale is probably right.
- Check the main room sizes against what is written or scaled from the drawing.
- Count doors and windows on each elevation and compare positions.
- Look for walls that have been added or removed, and for changes in floor level.
- Note anything that cannot be seen, such as the direction of floor joists or the position of beams, and treat the drawing as unconfirmed there.
Where the drawings fail these checks badly, a measured survey is usually cheaper than designing on a false base.
[edit] Getting paper drawings into CAD
Once the drawings are known to be reasonable, they usually need to be in CAD before design work can begin. There are three common routes:
- redrawing by hand over a scanned image, which is slow but lets the drafter interpret unclear areas;
- raster to vector tracing, which is fast on clean line work but copies stains, hatching and handwriting along with the walls;
- AI redrawing tools, such as Horezmi, which recognise walls, openings and rooms and draw them as CAD objects. They save time on readable drawings but still need checking against the original.
Whichever route is used, the resulting CAD drawing is only as good as the paper it came from. The checks above apply to the CAD version too.
[edit] Recording what is assumed
A drawing that mixes measured, copied and assumed information should say which is which. A simple note on the drawing, such as "overall dimensions checked on site, internal partitions from 1987 building control drawings, not verified", saves the next person from repeating the same checks or trusting the wrong ones.
[edit] Related articles
IHBC NewsBlog
Busaries open for IHBC's Annual School 10-12 June 2027

Apply for funded places for #IHBCBristolBath2027 until 1 February 2027
London's oldest restaurant given to National Trust

Rules will continue to open and income will fund conservation
No right to cross-pavment charging in England's conservation areas

Residents excluded from new permitted development rights
Save the Date for #IHBCBristolBath2027 on 'Climate Change & Significance'

Register now for updates on IHBC's Annual School 10-12 June 2027
Bath could pause UNESCO World Heritage Site status
Consultation on scheme to hit housing targets runs until 30 October 2026
Canals offer increasing innovation opportunities
Canal & River Trust sees canals playing role in UK's water security
IHBC sponsors Gardens Trust event 23-4 Sept 2026

'Learning from the Past, Shaping the Future’ takes place in Milton Keynes
Renovations to Frank Lloyd Wright's Fallingwater complete

World Heritage Preserved project opens house for tours again
Shakespeare Birthplace Trust places Hall's Croft on HAR Register
Stratford-upon-Avon home of Shakespeare's daughter is 'At Risk'
Lady Grange’s House repaired on St Kilda

National Trust for Scotland repairs stone cleit with link to famous island resident
Griff Rhys Jones on BBC Radio 4 Today programme

The Victorian Society’s President unveiled its latest Top Ten Endangered Buildings 2026.
Need a MATE? Book your place now.

IHBC offers free webinars on applying for IHBC accreditation (Full & Associate).
UK Stained Glass Repository finds windows new homes
How are stained glass windows are rescued, stored and repurposed?
APPGEBE report sets high aims for quality
'Government must not sacrifice quality in drive to build 1.5m homes'
New measures protect Historic Shipwrecks from heritage crime

Underwater cultural heritage benefits from new HE guidance
How could the City of London skyline look in 6 years' time?

Visualisation shows approved planning applications as completed buildings
National Trust for Scotland calls for VAT cuts
Heritage neglect is encouraged by current policies
IHBC's 'Context' Issue 186 features Industrial Heritage

IHBC's members' journal reports on the challenges of conserving infrastructure
Book now for IHBC Annual School 2026

IHBC Annual School is taking place 18-20 June 2026 in Newcastle
RICHeS Research Infrastructure offers ‘Full Access Fund Call’

RICHeS offers a ‘Help’ webinar on 11 March
Latest IHBC Issue of Context features Roofing
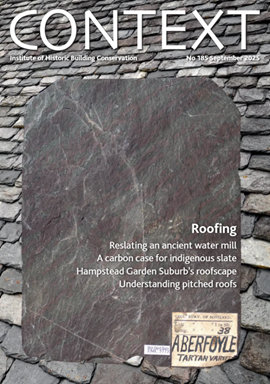
Articles range from slate to pitched roofs, and carbon impact to solar generation to roofscapes
Three reasons not to demolish Edinburgh’s Argyle House

Should 'Edinburgh's ugliest building' be saved?
IHBC’s 2025 Parliamentary Briefing...from Crafts in Crisis to Rubbish Retrofit

IHBC launches research-led ‘5 Commitments to Help Heritage Skills in Conservation’
How RDSAP 10.2 impacts EPC assessments in traditional buildings

Energy performance certificates (EPCs) tell us how energy efficient our buildings are, but the way these certificates are generated has changed.